New job containers-- attached to joists, mounted prior to drywall. Electrical contractor Charles Vargas upgrades as well as installs ceiling lights with This Old home host, Kevin O'Connor. Pointer-- This opening saw will develop a lot of completely dry wall surface dust.
China, you have to run electrical wiring per area beforehand. Then as I showed in the tutorial, you'll push both sets of cables right into the connector to chain them with each other. The number of collections of 12 scale cord can you attach to http://garrettytmp325.huicopper.com/delivery-to-customers one non-IC can? I want to connect 3 sets-- one set in from switch, two sets out to 2 other cans in daisy chain.
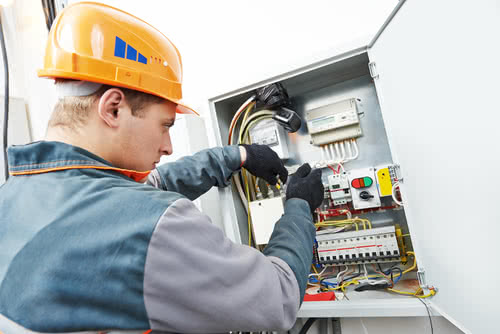
- Once you confirm that there is a present streaming to every opening, switch off the power.
- My electrical expert revealed me just how to make this awesome device out of a coat wall mount to identify if there are any type of blockages in the ceiling.
- Or, some lights may have push-fit connectors, which are identified by color.
- You may speak with a designer or a specialist to assist you decide on the very best light distribution.
However it's not rather as straightforward as selecting an electrical power and type of bulb-- a variety of variables enter into creating the final effect. Right here's what to take into consideration prior to installing recessed illumination at home. For open framework, acquire common real estates that consist of placing braces. If you're fishing wires into an existing ceiling, buy remodeling housings. Make sure to buy IC ranked housings if your recessed lights will be covered with insulation.
Recessed Illumination Without Attic Room Gain Access To
Recessed lights components made particularly for redesigning projects permit you to include light to any type of area. Attic access is not needed and also you won't require to patch the ceiling after! Discover how to install recessed lights without attic room accessibility with this tutorial. After drilling room for the recessed spotlights to be installed, make certain you inspect that you have electrical energy for each and every opening drilled by using the electrical tester. As soon as you validate that there is a present moving to every opening, switch off the power.
Prior to starting any electric work, contact your neighborhood municipality to figure out if an authorization is needed. Get rid of the mounting plate that comes pre-assembled in the illumination cone. This should be as very easy as well as loosening it misplaced.
Connect The Component Cables
Push the spring clips right into location until they snap in place. Eliminating the housing from under the light, specifically because you may have to reduce some of the electric box away or cut even more drywall than desired. Maintain all insulation at least 3 inches from the light.

Step 2: Shut Off The Power
See my recommended recessed lights components if you need assistance making a decision. You need to additionally think about obtaining cans or housings that are IC ranked which merely indicates they are safe to place up against insulation. Non IC rated cans can get exceptionally hot when making use of incandescent or fluorescent bulbs, but LED lights produce really little warm. The typical policy is to put the lights the same variety of feet apart as the bulb's size, in inches. So a light bulb with a four-inch size must be four feet far from the next light. Four-inch bulbs are excellent options for normal ceiling heights; 5- and six-inch light bulbs, additionally generally offered, benefit higher ceilings as they give off an extra effective light.
If you plan to drill through the joists yourself, don't drill an opening larger than 1/4 of the width of the joist. Spin the black cord leading to the light switch and the black wire of the recessed lighting fixture together and also screw on a cable nut. Attach the light button white wire and lighting fixture white cable together similarly. Wrap the bare copper basing cord or the environment-friendly shielded cord of the light change Informative post the environment-friendly grounding screw of the lighting fixture and also tighten the screw. Reducing a hole in your wall will certainly aid you install the housing and electrical wiring if you do not have accessibility to an attic room.
A top quality, durable LED light bulb will certainly cost you regarding $150. For a switch-controlled power outlet, run cables from the electrical outlet up to the ceiling from inside the wall surface. Draw the cords via the recessed lighting holes, with fish tape if required, leaving concerning 6 inches hanging from the openings. Connect the red cable from the switch to the black wire you are running to the ceiling. If required, cut an item of the drywall where the ceiling and also wall satisfy to run the cable from the wall surface to the ceiling.
However because many recessed lights are installed in multiples, the overall cost will be $1,000 to $1,500 for 5 lights and also $2,000 to $3,000 for 10 lights. This is all good review to get the basic concept. I only have one inquiry however, where did you get the Electric source from to light these recessed illumination? These details are as essential as the running the cables parallel to the joist to avoid going through them.